7 Best Tips for How to Choose Lighting for Parking Garages?

Time:2026-10-01 Author:Mason
0%

Choosing the right garage lighting is not simply about installing the brightest fixtures. It involves safety, visibility, energy use, maintenance, and human comfort. Drivers need to read signs, notice pedestrians, and identify obstacles without facing harsh glare. A poorly lit corner can feel unsafe, even when the measured light level seems acceptable.

James R. Benya, PE, FIES, a respected lighting designer and co-author of Lighting Design Basics, describes the purpose clearly: “Good lighting is about more than visibility; it is about creating an environment where people feel safe and comfortable.” That principle matters in parking garages. Light should guide people naturally, not overwhelm them.

This guide explains how to choose lighting for parking garages through seven practical considerations. It examines brightness, uniformity, color quality, glare control, motion sensors, fixture durability, and long-term operating costs. The details are tangible. Think of a driver turning from bright daylight into a dim ramp. Think of a pedestrian walking beneath flickering lamps. Small failures become noticeable quickly.

LED fixtures are often efficient. They are not automatically the best choice. Poor beam angles, weak controls, or unsuitable color temperatures can still create problems. Every garage has different ceiling heights, traffic patterns, ventilation conditions, and maintenance limits. No checklist is perfect.

Measure the space carefully. Test the light at night. Review the result from a driver’s seat and a pedestrian’s viewpoint. Good decisions come from both technical data and real experience.
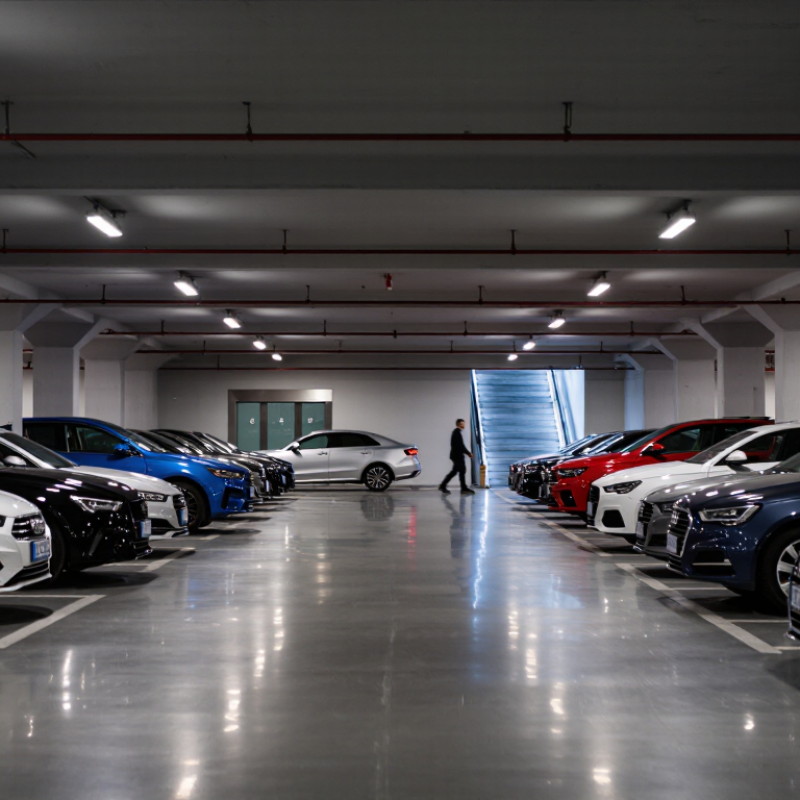
7 Best Tips for How to Choose Lighting for Parking Garages?

Define IES RP-20 Illuminance and Uniformity Targets for Safe Visibility

Choosing lighting for a parking garage begins with measurable visibility, not fixture appearance. IES RP-20 offers recommended illuminance and uniformity guidance for parking facilities. Use the current edition and confirm local requirements. Define maintained illuminance targets for ramps, driving lanes, pedestrian paths, entrances, and payment areas. Maintained values matter because dust, aging, and reduced output lower real performance.

Uniformity is equally important. A bright ceiling cannot compensate for dark patches between columns. Calculate the average-to-minimum ratio across each functional zone. Check both horizontal illuminance on the floor and vertical light on walls, signs, and pedestrians. Drivers need clear lane edges. People need recognizable faces. Field measurements should follow installation, preferably at night, with a calibrated meter. Recheck after several months. Conditions change.

Tip: Map the garage into lighting zones before selecting equipment. Record mounting height, ceiling color, column spacing, and obstruction points.

Tip: Compare calculated minimum values, not only average lux.

Tip: Review glare near ramps and entrances, where sudden contrast can slow visual adaptation.

I once trusted a uniformity result based on an overly generous measurement grid. The garage still had uncomfortable dark pockets. That mistake changed my process. Use a tighter grid around columns, corners, and turning areas. Good targets support safer decisions, but site judgment remains necessary. Pretty drawings are not proof.

Select LED Fixtures Delivering 100–150 lm/W and CRI 70 or Higher

Choosing parking-garage lighting starts with delivered performance, not impressive package claims. Select LED fixtures producing 100–150 lumens per watt at the fixture level. The U.S. Department of Energy’s solid-state lighting reports show that modern commercial LED systems can exceed 100 lm/W, but thermal conditions and optics reduce real output. Ask for LM-79 test data.

Aim for CRI 70 or higher. This threshold supports clearer recognition of vehicles, people, painted markings, and safety signs. The Illuminating Engineering Society’s parking-facility guidance also stresses uniformity and glare control, not brightness alone. A very efficient fixture can still create dark corners if its beam pattern is poorly matched to ceiling height and spacing.

Check performance at operating temperature. Garage ceilings collect dust, while enclosed fixtures may run hot. DOE CALiPER evaluations have shown that reported performance and field results do not always align. That deserves attention. Review lumen maintenance, ambient-temperature ratings, and warranty conditions. Compare delivered lumens after optical losses, not only LED-chip efficacy. Motion controls can reduce energy use, although frequent switching may shorten component life in some designs. IEA analysis identifies lighting as roughly 10% of global electricity demand, making efficiency valuable, but safety should guide every trade-off. A small pilot installation is wiser than trusting a spreadsheet.

7 Best Tips for Choosing Lighting for Parking Garages

Select LED Fixtures Delivering 100–150 lm/W and CRI 70 or Higher

Use the benchmark to compare LED fixture performance before reviewing photometric layouts. A practical selection should provide at least 100 lm/W, with 125–150 lm/W preferred for energy-efficient upgrades, and a CRI of 70 or higher for clear visibility. Also verify light distribution, glare control, occupancy dimming, ingress protection, rated life, and compliance with local lighting requirements.

Apply 3000–4000 K Color Temperature to Balance Comfort and Visibility

Choosing lighting for a parking garage requires more than checking brightness. Color temperature strongly affects how drivers see surfaces, signs, and pedestrians.

A range of 3000–4000 K usually balances comfort and visibility. Around 3000 K produces a warm, calm atmosphere, especially in residential garages. Near 4000 K creates a cleaner, sharper appearance for busy commercial areas. Very cool light may improve visual contrast, but it can also feel harsh under concrete ceilings. That discomfort matters during long evening hours.

Test the lighting at night, not only in a showroom. Walk beneath the fixtures and check faces, painted lines, stair edges, and vehicle mirrors. Look for glare across windshields. A small change in mounting height can affect comfort more than expected. Select fixtures with strong color rendering, so red warning signs and skin tones appear naturally. Even illumination is important; bright pools beside dark corners can make a garage feel unsafe.

Controls also deserve attention. Occupancy sensors can reduce wasted energy, but delayed activation may leave drivers entering dim areas. Adjust the response time on site. The 3000–4000 K range is useful, not universal. A garage with dusty surfaces, low ceilings, or aging eyes may need a warmer setting. One common mistake is trusting specifications without testing the actual space. Surface colors, glare, and maintenance conditions can change the result. A practical trial remains worth the extra effort.

Use Occupancy Controls: DOE Reports Energy Savings of Up to 75%

7 Best Tips for How to Choose Lighting for Parking Garages

Tip: Prioritize occupancy controls. Sensors can dim or switch lights when parking areas are empty. The U.S. Department of Energy reports energy savings of up to 75% from occupancy-based controls. Savings depend on traffic patterns, lighting schedules, and correct commissioning. Up to 75% is possible, not guaranteed.

Choose sensors that detect vehicles and pedestrians reliably. Place them near ramps, stairwells, payment areas, and turning lanes. A poorly positioned sensor may leave drivers in darkness. That creates safety concerns and customer complaints. Use gradual dimming instead of instant shutoff where practical. Drivers need time to adjust.

Tip: Test the system during real operating hours. Observe early mornings, busy evenings, and quiet weekends. Check whether lights respond before people enter each zone. Keep emergency lighting separate from normal occupancy controls. Controls should also include manual override access for maintenance staff. Do not ignore false triggers from exhaust fans, doors, or moving shadows. Some settings need repeated adjustment. That is normal. A garage can look efficient on paper yet perform poorly in daily use. Record sensor locations, time delays, dimming levels, and measured energy use. This documentation supports credible decisions and future maintenance.

7 Best Tips for How to Choose Lighting for Parking Garages? — Use Occupancy Controls: DOE Reports Energy Savings of Up to 75%
Tip Key Design Dimension Practical Target or Data Point Why It Matters How to Verify the Result
1Use occupancy controls Energy reduction during unoccupied periods Up to 75% lighting-energy savings can be achieved in suitable applications when occupancy controls reduce output or switch fixtures to a lower-light level. Parking garages often have long operating hours but variable traffic. Sensors can reduce unnecessary full-output operation while maintaining higher light levels when people or vehicles are present. Compare pre-installation and post-installation kWh usage, and confirm sensor coverage, time delays, dimming levels, and override settings.
2Select efficient LED fixtures Fixture efficacy and useful life Specify LED systems with approximately 100–160 lumens per watt, a rated life of at least 50,000 hours, and documented lumen-maintenance data. Higher efficacy delivers the required light with less connected load. Long rated life can also reduce relamping work in high or difficult-to-access locations. Check independent photometric files, input wattage, delivered lumens, warranty terms, and the manufacturer’s lumen-maintenance test information.
3Design for uniform illumination Average illuminance and uniformity Use the applicable local code and an IES-based lighting design. A common preliminary range for parking areas is approximately 5–10 horizontal lux for basic areas, with higher levels where traffic, security, or task requirements justify them. Uniform light helps reduce dark zones, glare, and abrupt changes in brightness that can affect driver and pedestrian visibility. Review a point-by-point photometric layout. Measure maintained illuminance at representative floor points after installation.
4Control glare and improve visibility Glare, shielding, and color rendering Prefer fixtures with appropriate shielding, controlled optics, and a color-rendering index of at least CRI 70 where normal identification and security visibility are required. Lower glare improves visual comfort for drivers and pedestrians. Adequate color rendering supports recognition of people, vehicles, signs, and surface conditions. Inspect mounting height, beam distribution, viewing angles, and glare conditions from driver and pedestrian viewpoints.
5Match the fixture to the environment Moisture, dust, impact, and temperature resistance For exposed or damp garage areas, select an enclosure rating appropriate to the location, such as IP65 or higher where dust-tight and water-jet protection are needed. Confirm the required impact rating separately. Parking garages may experience humidity, exhaust residue, water spray, vibration, and occasional impact. A suitable enclosure helps maintain performance and reduce premature failures. Review the tested IP or equivalent enclosure rating, operating-temperature range, corrosion resistance, and impact certification required by the project.
6Use daylight and zoning controls Daylight response and lighting zones Divide the system into logical zones such as entrances, ramps, drive aisles, pedestrian paths, and low-traffic areas. Use daylight-responsive dimming where daylight is available and stable enough to be useful. Different areas have different occupancy and daylight patterns. Zoning prevents the entire garage from operating at the same output when only one area needs full illumination. Confirm that control zones align with the lighting layout and that photocells are positioned away from direct fixture light and reflected glare.
7Plan commissioning and maintenance Controls, cleaning, and maintained performance Document sensor settings, emergency-lighting interfaces, schedules, and cleaning intervals. Establish a baseline of connected load and measured illuminance before occupancy-control adjustments. Incorrect sensor aiming, excessive time delays, dirty lenses, or poorly configured dimming can eliminate expected savings and create dark spots. Commission the system at night, test normal and emergency modes, record fixture wattage and light levels, and review operating data after 30–90 days.
Planning note: The “up to 75%” figure is a maximum reported potential for appropriate occupancy-control applications, not a guaranteed result for every parking garage. Actual savings depend on occupancy patterns, baseline operating hours, control strategy, dimming levels, maintenance, and local lighting requirements.

Meet NFPA 101 Emergency Lighting: 1 fc for 90 Minutes

Choosing parking garage lighting begins with safety, not fixture appearance. NFPA 101 emergency lighting generally requires at least 1 foot-candle of average illumination along the path of egress. It must operate for 90 minutes after normal power fails. Local adoption and the authority having jurisdiction still matter.

Map stairs, ramps, exits, pedestrian doors, and payment areas before selecting equipment. Use photometric calculations, then verify conditions on site. A bright ceiling can still leave dark corners. Poorly aimed fixtures may create glare near drivers’ eye level. Use even spacing and controlled distribution. Keep emergency units visible, accessible, and protected from vehicle impact.

Choose equipment rated for dust, moisture, temperature changes, and vibration. Check battery capacity, charging indicators, and expected maintenance access. Test the emergency system under real conditions, not only during a daytime inspection. Record the starting illumination and the reading near the 90-minute mark. The numbers may disappoint you.

One practical mistake is trusting a drawing without measuring the finished garage. Concrete columns, parked vehicles, and new signs can alter light levels. Emergency illumination should remain clear along the entire escape route, including stair landings and changes in elevation. Keep normal lighting comfortable, but never let decorative brightness replace emergency performance.

FAQS

What efficiency should parking-garage LED fixtures provide?

Target 100–150 lumens per watt at the fixture level. Ask for LM-79 test data. Chip efficiency alone can mislead.

Why is CRI 70 or higher recommended?

CRI 70 or higher helps people recognize vehicles, faces, markings, and warning signs. It supports clearer visual decisions. Higher is not automatically better for every budget.

How should glare and dark corners be evaluated?

Check uniformity, beam angles, ceiling height, and fixture spacing together. Walk beneath the lights at night. Inspect stair edges, mirrors, and painted lines. Bright pools can still feel unsafe.

What color temperature suits most parking garages?

A range of 3000–4000 K usually balances comfort and visibility. Around 3000 K feels warmer under concrete ceilings. Near 4000 K looks cleaner in busy areas. Test the actual space.

Can very cool lighting improve visibility?

It may increase contrast, but it can also feel harsh. This is noticeable during long evening hours. Dusty surfaces and low ceilings may favor warmer light. Comfort deserves attention too.

How much energy can occupancy controls save?

Properly installed controls may reduce lighting energy use by up to 75%. Actual savings depend on traffic, schedules, and commissioning. That figure is possible, not guaranteed. The spreadsheet can be wrong.

Where should occupancy sensors be installed?

Place sensors near ramps, stairwells, payment areas, and turning lanes. They should detect vehicles and pedestrians reliably. Avoid locations affected by exhaust fans, doors, or moving shadows. Some adjustment is normal.

What should be tested before full installation?

Run a small pilot during busy evenings, quiet weekends, and early mornings. Check activation before people enter each zone. Measure response times, dimming levels, glare, and energy use. A pilot may expose assumptions.

How do temperature and dust affect lighting performance?

Enclosed fixtures may run hot, while garage ceilings collect dust. Review ambient-temperature ratings and lumen maintenance. Compare delivered lumens after optical losses. Field performance may differ from published figures.

Should normal lighting controls operate emergency lighting?

Keep emergency lighting separate from ordinary occupancy controls. Provide manual override access for maintenance staff. Use gradual dimming where practical. Instant shutoff can feel unsafe.

Conclusion

Learning how to choose lighting for parking garages begins with defining clear performance goals. Use IES RP-20 recommendations to establish suitable illuminance and uniformity levels, helping drivers and pedestrians see clearly while reducing dark spots and glare. LED fixtures with an efficacy of approximately 100–150 lumens per watt can provide efficient, dependable illumination, while a CRI of 70 or higher supports accurate visibility of people, vehicles, signs, and surfaces.

Color temperature also affects comfort and perception. A range of 3000–4000 K offers a practical balance between a welcoming atmosphere and visual clarity. To reduce unnecessary energy use, add occupancy-based controls that dim or raise lighting according to movement; properly applied systems may reduce consumption by up to 75%. Finally, emergency lighting should meet NFPA 101 requirements, including at least 1 foot-candle of illumination for 90 minutes, ensuring essential visibility during power interruptions or other emergencies.

Mason

Mason

Mason is a seasoned marketing professional with a deep expertise in the company's offerings and a passion for driving brand awareness. With a strong background in digital marketing strategies, he has an innate ability to connect with diverse audiences and effectively communicate product benefits.......